- features
- templates
- electrical takeoff
Template properties: how a contractor saved 40% of estimating time
TakeOn template properties are custom fields on a takeoff item — type, voltage, circuit — with value lists and conditional fields. The takeoff groups by them.
The TakeOn Team Updated 6 min read
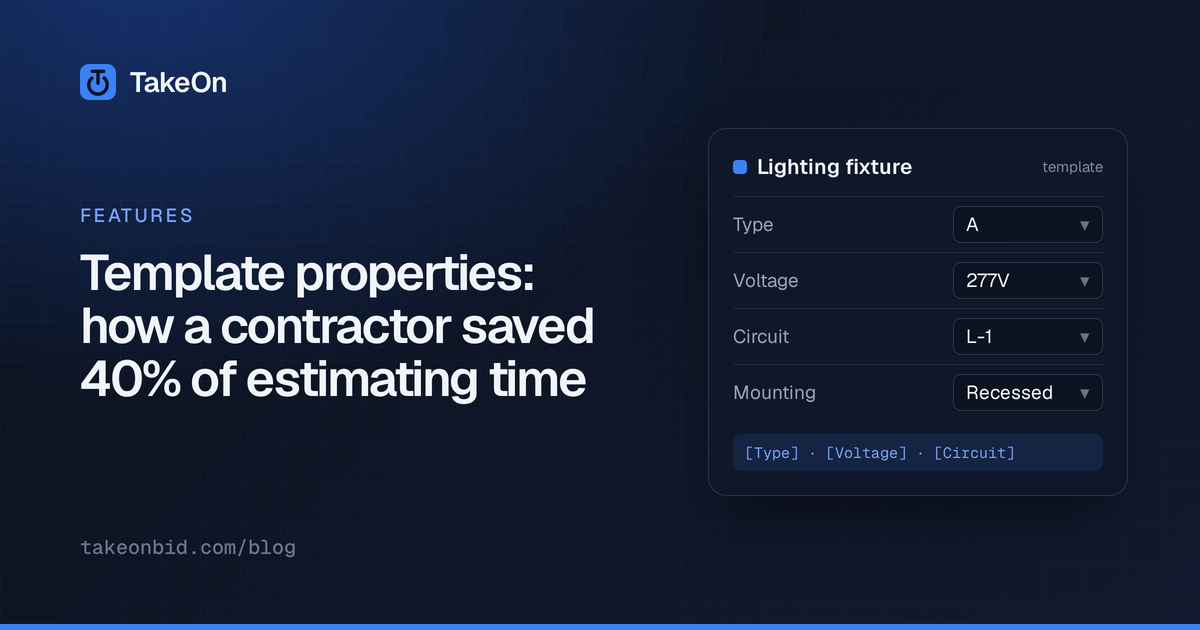
In short: A template in TakeOn is a reusable definition of something you count or measure, and template properties are the custom fields on it — type, wattage, voltage, circuit, mounting. Properties can be value lists (dropdowns), conditional (shown only when another property has a given value) or sticky (carried to the next placement). Annotations that share a template but differ in property values group separately, so one takeoff breaks down by any property without a second spreadsheet.
Key takeaways
- A template is defined once per workspace and reused on every project.
- Value lists keep entries consistent; conditional properties hide fields that don’t apply; sticky properties stop you re-typing the same circuit all day.
- Same template + different property values = separate groups, each with its own colour and live total.
- A bracket name format such as
[Type] · [Voltage]writes every annotation’s label from its properties. - The worked example below follows one lighting takeoff from template setup to the grouped result.
The single feature that converts the most estimators to TakeOn isn’t the collaboration. It isn’t Find Similar. It’s templates with real properties.
To explain why, here’s a worked example from an actual contractor’s bid — a 40,000 sqft commercial remodel with about 180 lighting fixtures across four floors, twelve fixture types, three voltages, and a dozen branch circuits. We’ll do the takeoff two ways: the way Bluebeam encourages, and the way TakeOn encourages. Then we’ll talk about the time the estimator actually saved (about 40%, hence the title) and why.
Names are anonymized at the estimator’s request, but the job and the numbers are real.
The job
- 40,000 sqft, four floors, commercial remodel.
- Roughly 180 lighting fixtures.
- Twelve distinct fixture types (Type A through Type L).
- Three voltages (120, 277, and a small handful of low-voltage tracks).
- Twelve branch circuits (L-1 through L-12).
- Three mount styles: recessed, surface, pendant.
The deliverable was a BOM split by fixture type, with subtotals by voltage and by circuit. Standard request from the GC’s estimating spreadsheet — not exotic.
The old way (Bluebeam tool sets)
The estimator’s previous workflow used Bluebeam tool sets. Each fixture type got its own symbol in the tool set — twelve symbols total, one per type. Counting the plan meant clicking each symbol in turn (Type A, then Type B, then Type C, etc.), then reading the per-symbol count off the markup list.
The problem was the cross-cutting breakdowns. The GC wanted subtotals by voltage and by circuit, not just by type. Bluebeam tool sets don’t carry properties — a symbol is a symbol, and it doesn’t know what voltage or circuit it’s on. So the estimator did what every Bluebeam estimator does: kept a side spreadsheet with twelve rows, one per type, and filled in voltage and circuit columns by hand.
Two problems with this. First, the spreadsheet and the plan are different files, edited at different times. A typo in either breaks the BOM, and you won’t catch it until the GC asks. Second, every time the plan revs — and on a 40k sqft remodel, plans rev — you re-do both. Re-count the plan, re-fill the spreadsheet, hope they match.
Estimated time for the original takeoff using this workflow: about 6.5 hours, including the spreadsheet reconciliation. About 30% of that was the spreadsheet work, not the actual counting.
The TakeOn way
In TakeOn, fixture counts and the BOM live in the same place — the plan — because annotations carry properties. The setup for this job was a single template:
Template: Lighting Fixture
  Type      (value list: A · B · C · D · E · F · G · H · J · K · L · M)
  Voltage   (value list: 120 · 277 · low-voltage)
  Circuit   (sticky text)
  Mount     (value list: recessed · surface · pendant)
One template. Four properties. Six minutes to define it from scratch.
Counting the plan meant picking the Lighting Fixture template and clicking
each fixture. For each new fixture group, the estimator changed the Type,
Voltage, Mount, and Circuit fields before clicking. The Circuit
property was marked sticky, so once set, it carried forward to the next
placement until the estimator changed it. That alone removed maybe a third of
the keystrokes — most of the time, several fixtures in a row share a circuit.
Here’s where it gets interesting. As the annotations landed, the right-side takeoffs panel showed groups appear automatically:
Lighting Fixture · Type A · 277V · L-1   ·  recessed     ·  12 ea
Lighting Fixture · Type A · 277V · L-3   ·  recessed     ·   8 ea
Lighting Fixture · Type B · 277V · L-1   ·  surface      ·   6 ea
Lighting Fixture · Type B · 120V · L-7   ·  pendant      ·   4 ea
Lighting Fixture · Type C · 277V · L-1   ·  recessed     ·  18 ea
...
The estimator never had to ask the BOM to group this way. Same template, different property values = different group, different color on the canvas, different running count. The plan and the BOM are the same artifact.
A small but important detail: conditional and bracket-name
Two property-system features made this faster than it sounds.
Conditional properties. The original template definition included a
Track length property that only matters for low-voltage track lighting.
Marking it conditional on Voltage = low-voltage meant the property panel
showed it only when the estimator was actually placing a track fixture. For
everything else, the panel had four fields instead of five. Less to look at,
less to mis-fill.
Bracket-name formatting. The template’s name format was set to
Type [Type] [Voltage]V L-[Circuit]. With one click, every annotation got a
label like Type C 277V L-1 baked in. That label is what shows on the canvas,
in the takeoff, and in the exported BOM. No one had to type a single label
string by hand.
These aren’t headline features. They’re the kind of thing you notice on the
second day, when you realize you haven’t typed 277 once.
The export
The export-to-Excel button produced a spreadsheet with columns: Plan, Name, Qty, Unit, Type, Voltage, Circuit, Mount. One row per group. The GC’s estimating spreadsheet accepted it directly — no reconciliation, no copy-paste.
When the addendum came in (it always does), the estimator restored a saved checkpoint of the pre-addendum state, ran the updated plan side-by-side using overlay, and exported a diff. The change order was priced from a real quantity-delta document, not from memory.
The numbers
Pre-TakeOn, this kind of job took the estimator about 6.5 hours end to end, including the spreadsheet reconciliation.
In TakeOn, the same job took about 3.8 hours.
That’s the 40% in the title. Breaking it down: about half came from the spreadsheet step disappearing entirely. The other half came from the property-grouping showing breakdowns the estimator used to compute by hand — voltage subtotals, circuit subtotals, mount-style splits.
The estimator’s words, lightly edited: “It’s not that any one thing got faster. It’s that I used to do counts twice — once on the plan, once in Excel — and now I do them once. That, and I didn’t fight the BOM.”
Setup vs. payoff
The honest pitch for this feature isn’t “you’ll be faster on day one.” It’s that the template setup is a one-time investment — maybe 15-30 minutes to build out a workspace’s worth of trade-specific templates — and after that, every subsequent job pays back at the rate of the spreadsheet step you no longer do.
For a shop doing fifteen bids a year, the math works out fast. For someone who’d run two or three takeoffs a year, the property system is probably overkill and Bluebeam tool sets are fine.
If you want to see the template system without committing to anything, schedule a demo and we’ll build one template together. That’s the whole pitch — there isn’t really a more complicated version of it.
Frequently asked questions
- What are template properties in TakeOn?
- Template properties are custom fields attached to a takeoff template, such as fixture type, wattage, voltage, circuit or mounting. Every annotation placed with that template carries a value for each property.
- What is a value list in TakeOn?
- A value list is a fixed set of choices for a property, shown as a dropdown, so every estimator enters the same value the same way instead of typing free text.
- What is a conditional property in TakeOn?
- A conditional property only appears when another property has a specific value. For example, a track-length field can be set to appear only when Voltage is low-voltage, so it shows up for track lighting and stays hidden for everything else.
- How does property-based grouping work in TakeOn?
- Annotations that use the same template but have different property values are placed in separate groups. Each group has its own colour and its own running total, so the takeoff breaks down by any combination of properties without a spreadsheet.
- What does bracket name formatting do in TakeOn?
- A name format such as [Type] · [Voltage] · [Circuit] builds each annotation's label from its property values automatically, so labels stay consistent and never have to be typed by hand.